
Today I will be showing you how to draw a grasshopper!
How do you feel about insects?
You LOVE them!? Great!
Today, we are drawing a grasshopper step-by-step so that you can follow along.

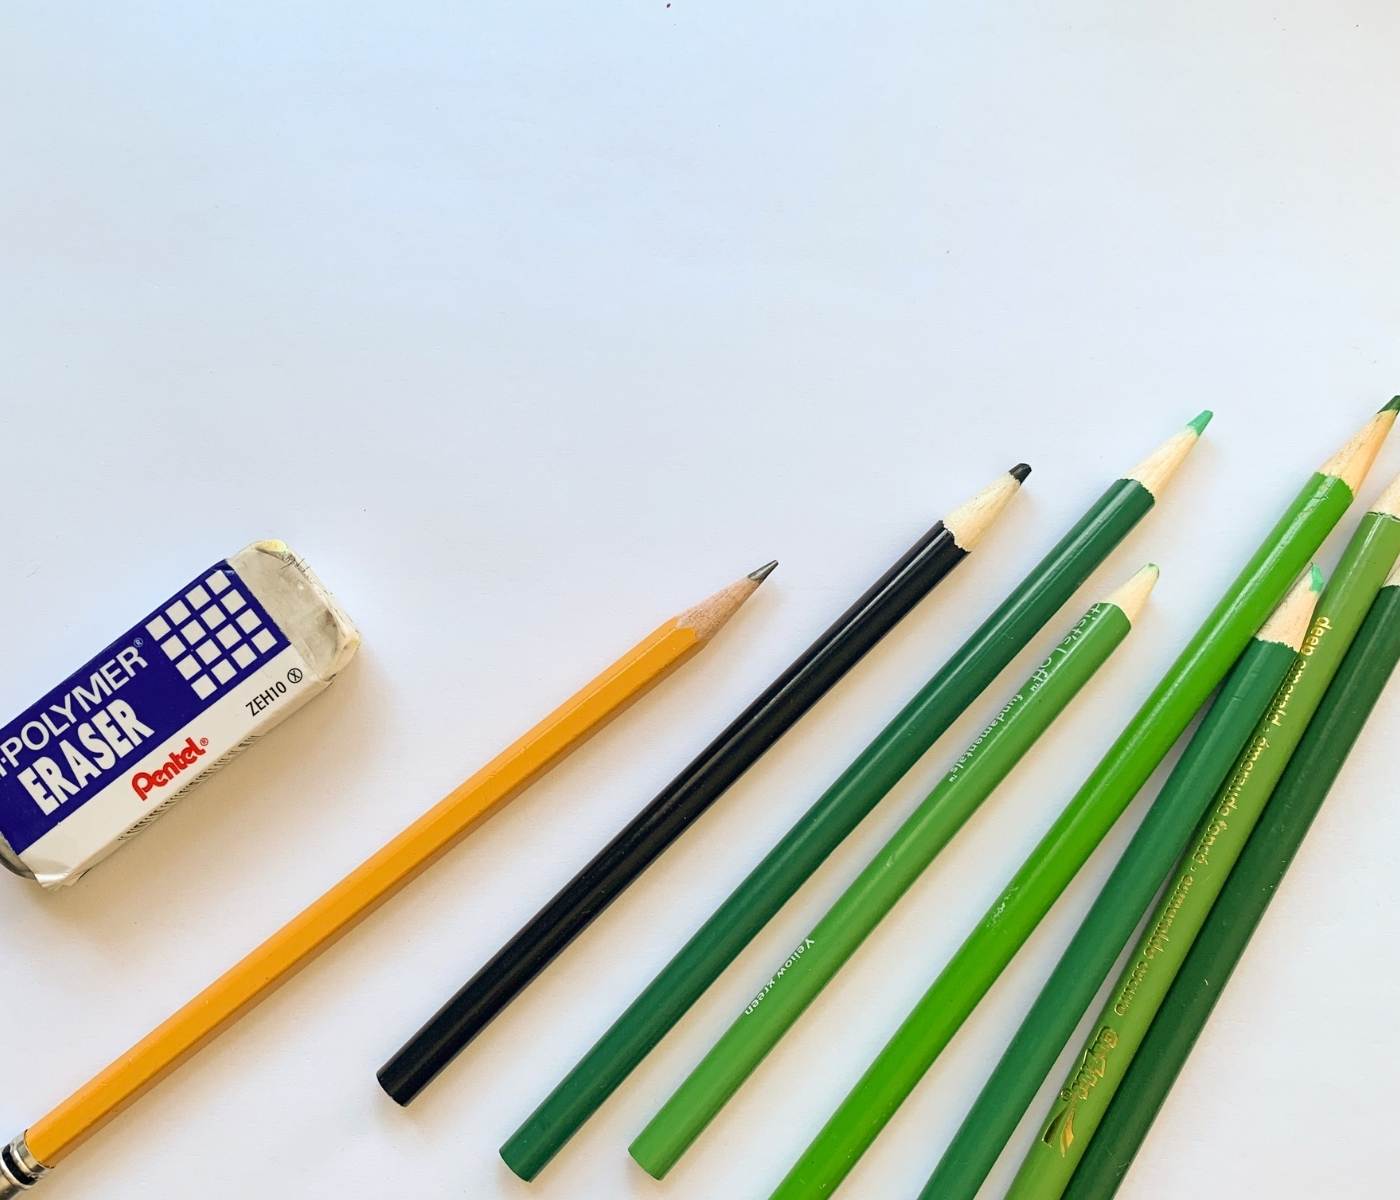
Supplies you will need for drawing a grasshopper include:
- Paper
- Pencil
- Eraser
- Colored Pencils, crayons, markers
Artist tip: As with any drawing it’s important to recognize how much space you are working with.
To do this, point to the middle of your paper with your finger or pencil.
This will tell your eyes how much space you have to draw in. It does not have to be exact!
Draw a grasshopper head with ovals
Let’s get started:
1. Draw a medium sized oval on the right side, middle-ish.

2. Next off of the circle, draw a square shape with rounded sides.

3. Ok, off of this shape draw a L-O-N-G oval with a flatter top and a more round bottom.
Think “Wing” shape.

How to draw grasshopper wings
4. Under this wing shape, draw half of a pointed oval.
This will be the abdomen (body). It is not attached to anything YET!

5. Next, attach it to the square shape with an L shape.
This will “look” like another square, because of where it is.

6. Now, let’s add some details: an oval in the head, for an eye.
Draw a curved line for the mouth area, thankfully we cannot see it, so we will just add lines.

How to draw insect antennas
7. Fun part: Long antenna, using long loose lines.

8. Draw curved vertical lines on the abdomen.

Draw grasshopper legs
9. Now, for the best identifier of a Grasshopper, its LEGS!
On the top of the Grasshopper, starting just past the beginning of the wing, draw a diagonal line up to a point and then down towards the end of the wing, like the top of a triangle.
Add another line to the top line coming to a point at the top, to make it look thicker.
Then add a foot just underneath the end of the abdomen, a half circle/oval with a line attached.

10. Front – Back leg: We are going to repeat what we just did.
This time we can see where it is attached to the abdomen, this will be a rounded edge just passed the abdomen.

11. Middle Legs: These are short legs that come from the beginning of the abdomen. Draw short lines with long flat rectangles for the ”feet”.
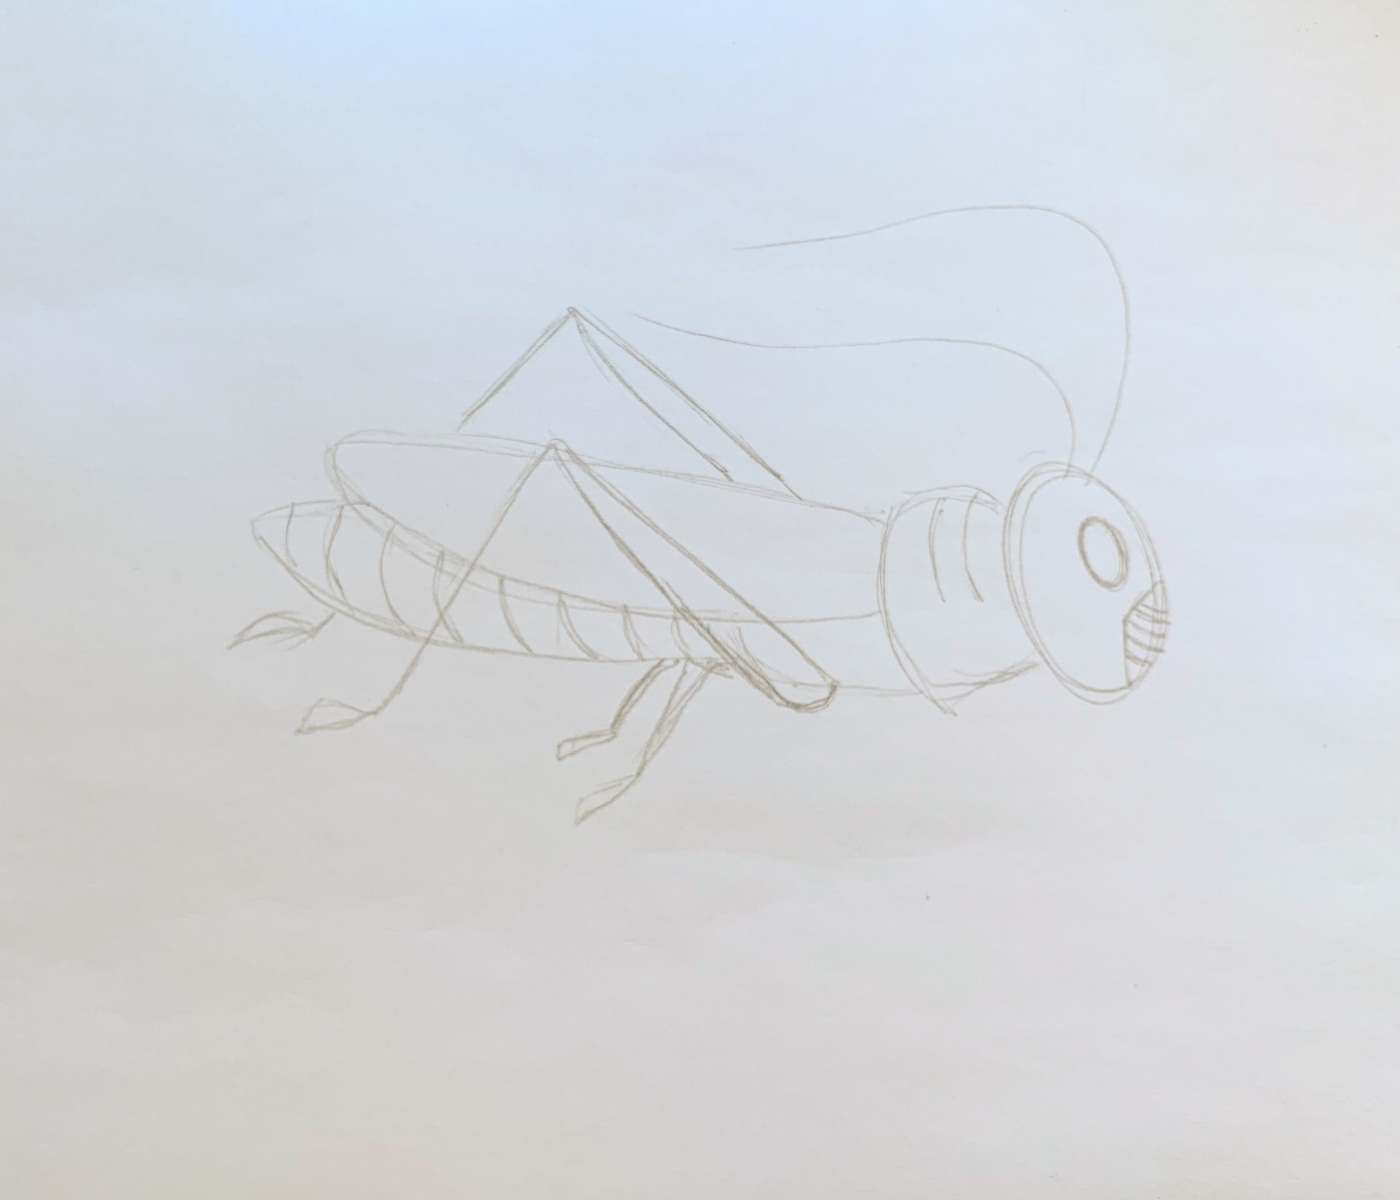
12. Front Legs: these legs have a slight curve down to them. T
hey start from the square shape (prothorax) with the long rectangle at the ends.

13. Optional detail: the veins on the wings.
These will be lines running through the wing, long through the middle and curved V shapes off of that.
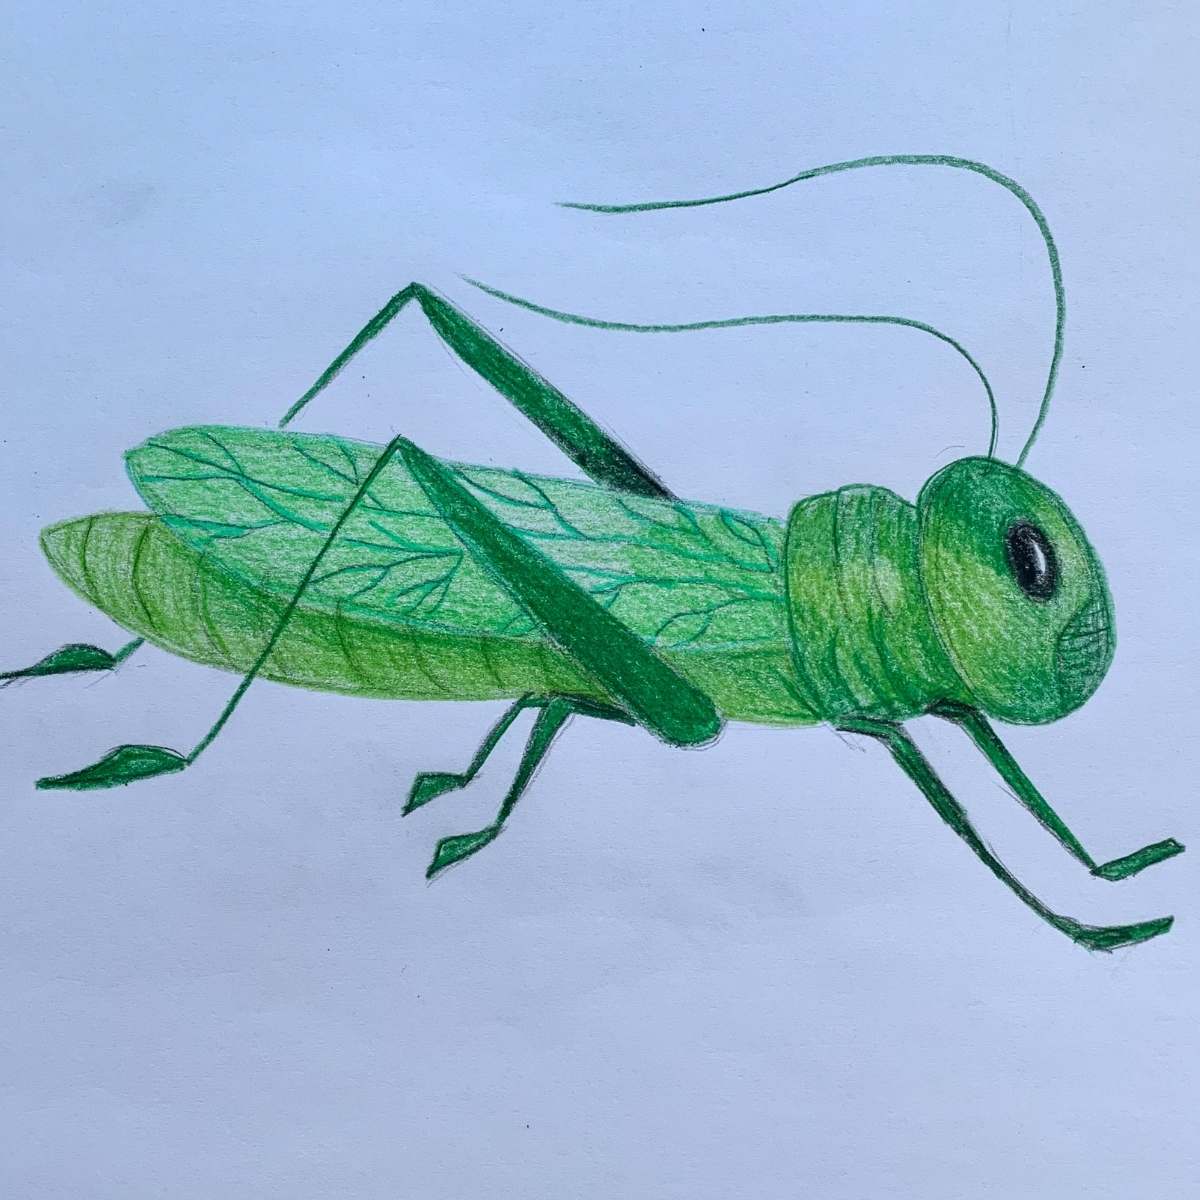
How to color a grasshopper
The Best Part: COLOR!
Grasshoppers can be many colors, the most common are greens, yellows and browns.
They ALSO come in bright pinks, purples and blues!
There you go… a grasshopper drawing step-by-step. Where you able to follow along?
Let’s see what else we can draw together…next time.